Fortify Static Code Analyzer scanner reference for STO
You can ingest repository scan results from Fortify.
Important notes for running Fortify scans in STO
Root access requirements
You need to run the scan step with root access if either of the following apply:
-
You need to run a Docker-in-Docker background service.
-
You need to add trusted certificates to your scan images at runtime.
You can set up your STO scan images and pipelines to run scans as non-root and establish trust for your own proxies using self-signed certificates. For more information, go to Configure STO to Download Images from a Private Registry.
For more information
The following topics contain useful information for setting up scanner integrations in STO:
Security step settings for Fortify scans in STO
Target and variant
The following settings are required for every Security step:
target_nameA user-defined label for the code repository, container, application, or configuration to scan.variantA user-defined label for the branch, tag, or other target variant to scan.
Make sure that you give unique, descriptive names for the target and variant. This makes navigating your scan results in the STO UI much easier.
You can see the target name, type, and variant in the Test Targets UI:
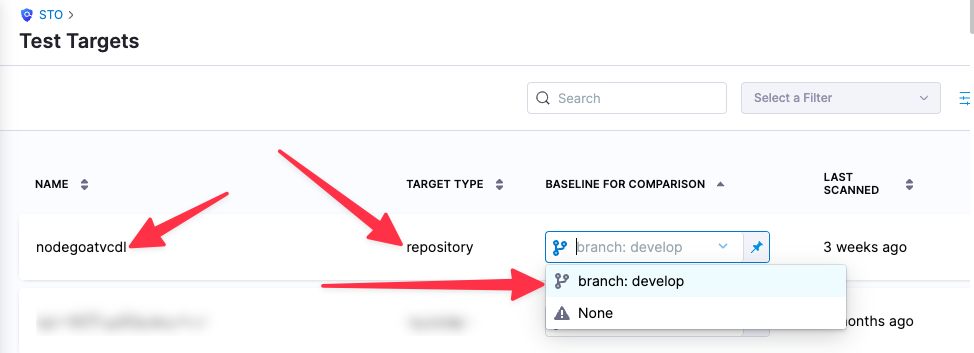
For more information, go to Targets, baselines, and variants in STO.
Fortify scan settings
product_name=fortifyscan_type=repositorypolicy_type=ingestionOnlyproduct_config_name=defaultfail_on_severity- See Fail on Severity.
Ingestion file
If the policy_type is ingestionOnly:
ingestion_file= The path to your scan results when running an Ingestion scan, for example/shared/scan_results/myscan.latest.sarif.
-
The data file must be in a supported format for the scanner.
-
The data file must be accessible to the scan step. It's good practice to save your results files to a shared path in your stage. In the visual editor, go to the stage where you're running the scan. Then go to Overview > Shared Paths. You can also add the path to the YAML stage definition like this:
    - stage:
      spec:
        sharedPaths:
          - /shared/scan_results
Fail on Severity
Every Security step has a Fail on Severity setting. If the scan finds any vulnerability with the specified severity level or higher, the pipeline fails automatically. You can specify one of the following:
CRITICALHIGHMEDIUMLOWINFONONE— Do not fail on severity
The YAML definition looks like this: fail_on_severity : critical # | high | medium | low | info | none